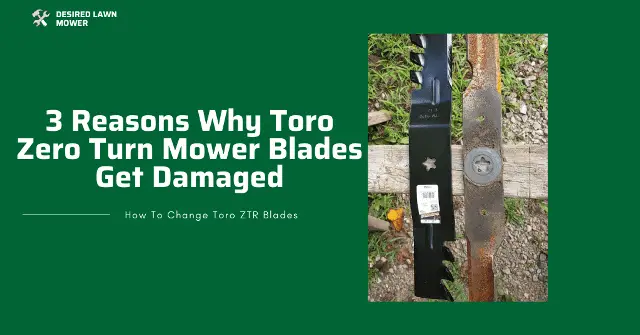
The easiest way to ruin your zero-turn mower blades is by running them across wet damp areas or rocky highly detailed terrain frequently. Even using mismatched power to tackle large acres of fields or commercial use, in general, will tell on the blades of your mower since after all the biggest blade-destroyer is time. So a damaged blade is no new news.
When you start to see annoying stragglers here and there and patches of brown fading grass on your lawn, chances are the blades of your Toro zero-turn mower are due for replacement. In some cases, all that is required is for the blades to be sharpened skillfully, but for the better half of the circumstance like this one, a replacement could be your only saving grace. I’ll be discussing how to easily replace your Toro zero-turn blades without pulling down the entire sky! Let’s not waste any more time.
Tools You Will Need For Blade Replacement
- Durable gloves
- Wooden wedge
- Torque Wrench (view on Amazon)
- Socket Wrench Set (view on Amazon)
- Open-end wrench
- A lot of elbow grease
Step-By-Step Toro Zero-Turn Mower Blade Replacement
Replacing zero-turn mower blades is quite easy especially if you are familiar with parts of the mowing machine. It could be a little tricky for newbies, but there’s no situation where a good explanation couldn’t help.
1. Ensure The Parking Brake Is On/Pulled Down
Safety is crucial when dealing with zero-turn mowers. You do not want the machine moving around when you’re fiddling with the deck and blades. Also, make sure the mower is on a proper flat surface to further emphasize your safety.
2. Release The Deck To The Lowest Position
I’ve seen some experts skip this step and this is because they are experienced enough to handle dismantling the deck. After all, it’s only a safety feature to protect the deck from slamming against the floor when you release it completely. However, it’s still the best thing to do if you have to remove the cutting deck from the whole mower and I strongly advise you to do so.
3. Take Off The Left Pulley Cover
By loosening the bolts on the pulley cover, you can easily remove the cover to access the spindle pulley and belt.
4. Remove The Drive Belt From The Spindle Pulley
Now that the left pulley cover is off, you can now access the drive belt and wriggle it out of the spindle pulley to further release the deck.
5. Locate The Electric Clutch And Unwind The Drive Belt
The electric clutch is located at the bottom of the deck with part of the drive belt wrapped around it. All you have to do is slip your hand underneath it and pull the drive belt off the electric clutch entirely, disassembling the belt from the deck.
6. Disconnect All Mounting Pins
You will find the mounting pins attached to the deck hanging brackets bolt. They look like bobby pins if you’re unsure of how to find them. All you have to do is pull them away from the bolt and keep them away safely.
7. Release Deck Hanging Brackets From The Mower
Loosen the bolts holding the hanging brackets to free the entire deck from the mower. Now, you have safe complete access to the mower deck blades.
8. Flip Mower Deck And Loosen Blades
Now that you have the deck separated and flipped, the blade removal process begins. Place a wedge between the walls of the deck and the blades so that they don’t move around when you unscrew the blade mounting bolt. The blade will come off right after the bolt is unscrewed.
9. Mount The New Blade And Screw In Tight
To insert a new blade is pretty easy; align the blade with the bolt slot and insert the mounting bolt firmly. Screw in tight to about 50 ft Ibs or till you can’t go further for satisfaction. To reinstall the deck to the mower frame, all you have to do is follow the process backward. Everything should go nicely if you take your time and follow the steps carefully.
A Shortcut To Removing Toro Zero-Turn Cutting Blades
If you like to get things done the easy way like me and are confident with handling mowers and their parts, you really don’t have to dismantle the entire mower deck. You can tilt the mower sideways or on the back tires of the machine to access the blades. Some professionals don’t even need to tilt the machine that far back; they just squeeze in and voila! I wouldn’t advise you to follow this route without muscle memory, though, especially if you love your hands.

Possible Reasons Why Your Toro Z-Turn Mower Blades Are Damaged
Mower blades are made of metal and are subjected to a whole lot of craziness buried between the strands of grass. In fact, the blades get beaten the most out of the whole mowing machine. So, it’s not a surprise if your Toro zero-turn mower blade gets damaged. Here are a few reasons why:
Improper Maintenance
Leaving clumps of clay and dirt on the blades for long, long periods will cause the blades to rust and decay. It is advised to clean the blades after each mow to preserve their lifespan. It does not matter if the grass was dry or what-have-you; always make sure there’s no crust resting on the blades before you store the mower.
Too Much Washing
Washing underneath the deck is for a good cause, true, but frequent washing could wear out the blades and diminish their lifespan. I suggest you carefully remove dirt with a brush or a scraper to ensure that the blades stay mostly dry.
Poor Storage Habits
The Toro zero-turn mower needs to be kept dry at all times. Already, the airy nature of the Toro deck helps in attaining the needed environment, but letting your mower sit in damp areas or worse, exposed to the rain, will negatively affect the whole machine including the blades. Rust will be more than happy to settle in the joints and bolts of the mower, without neglecting the blades. Ensure that your mower is kept dry AT ALL times especially before you keep it away after use.
Mowing At The Fast Speeds Frequently
The Toro zero-turn mower is equipped with three speeds; tow, turbo, and fast. While I realize it’s highly capable of mowing at fast speeds, it will undoubtedly wear the blades of the mower and you might start to wonder why. If you love to zap through the yard at the maximum speed, try slowing down on some occasions to give the blades a chance of lesser momentum and a longer lifespan.
How To Sharpen Toro Zero-Turn Mower Blades
With vice and a filer, you might just save your new blades for the worst-case scenario and reuse the present blade.
Secure The Toro ZTR Blade In The Vice
Make sure the vice is placed on a leveled plain. Slanting or unevenness will cause you to either hurt yourself or further damage the blade.
Grind On Opposite Sides For A Sharp Edge
Using a metal filer, grind on the sides of a blade till it’s suitable for you. Make sure not to grind away too far to the middle of the blade as this would cause it to snap when it’s being used in full momentum. If it’s already been sharpened to a visible size difference from the original blade, I’d suggest you stick to the initial plan and replace the blades of your machine.

How To Choose The Best Replacement Blades For Your Toro Zero-Turn Mower
There are four different types of blades you can attach to your zero-turn mower for a better experience. Also, pairing the correct match will potentially increase the lifespan of the blades because it’s possible for them to get damaged when continuously used the wrong way. Here’s how to choose:
Standard Blades
These are the universal blades most zero-turn mowers come with on first purchase. They offer a suitable suction and can be used in any kind of condition or field of grass. The only issue is if you seek to perform a significant cutting purpose on your lawn like mulching, you’d be getting 70% of joy at that. At least you get 70% satisfaction from many other cutting options with the blade. Here’s a better description of what they look like (view on Amazon).
Air Lifting Blades
These blades are specifically used to propel air and create good suction. So if you mow sandy areas or places with sparse grass, this is the best blade for you. They are also quite noiseless to a degree and much longer lasting. Perhaps your blades have been wearing out because you are using the wrong one on your airy, sandy fields. Here is an example of each type:
- High Lift blades (view on Amazon)
- Low lift blades (view on Amazon)
Mulching Blades
Mulching blades come in two types also; the regular mulching blade and the gator blade. The regular mulching blades are similar to the airlifting blades but have more sharp edges to cut the grass into smaller pieces as you whizz by. While the gator blades distinguishly come with little fork-like stumps that help to mulch at an even greater degree.
Best for mulching humid wet areas that would be a pain with regular blades. The only problem with this asset is that it could tear your grass if you move around too fast. So I advise you to run in turbo mode again for a better ordeal.
I’ve included an example of each type to help you visually understand their differences:
- Regular mulching blades (view on Amazon)
- Gator blades (view on Amazon)
Finally, The End Of Our Discussion
Changing your Toro zero-turn mower blades is an easy task. It might be a lengthy process, but it’s not too tricky to interpret. I strongly advise you to use gloves since you’re handling blades. Blunt, they may be but they’re blades nonetheless. Good luck with your adventure!
